Installation Guide
Learn how to install and activate WP Outreach on your WordPress site.
System Requirements
Before installing WP Outreach, ensure your server meets these minimum requirements:
| Requirement | Minimum | Recommended |
|---|---|---|
| WordPress | 6.0 | 6.4+ |
| PHP | 8.0 | 8.2+ |
| MySQL | 5.7 | 8.0+ |
| Memory Limit | 128MB | 256MB+ |
HTTPS: We strongly recommend using HTTPS for all sites using WP Outreach to ensure secure email tracking and subscriber data protection.
Installation Methods
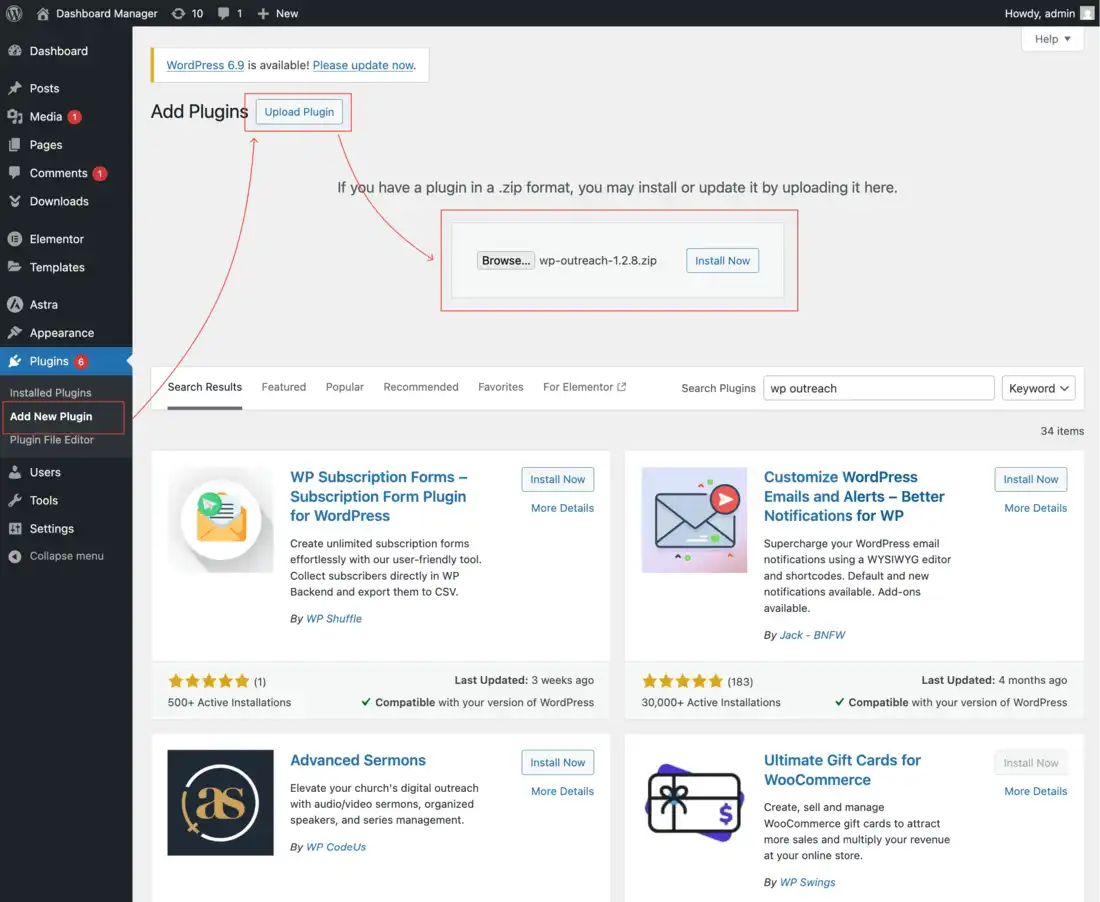
Method 1: Upload via WordPress Admin (Recommended)
This is the easiest way to install WP Outreach:
- Download the
wp-outreach.zipfile from your account dashboard - Log in to your WordPress admin panel
- Navigate to Plugins → Add New
- Click the Upload Plugin button at the top
- Click Choose File and select the downloaded ZIP file
- Click Install Now
- After installation completes, click Activate Plugin
Method 2: FTP/SFTP Upload
For advanced users or when the WordPress upload method is not available:
- Download and extract
wp-outreach.zipto your computer - Connect to your server using an FTP client (FileZilla, Cyberduck, etc.)
- Navigate to
/wp-content/plugins/ - Upload the entire
wp-outreachfolder - In WordPress admin, go to Plugins → Installed Plugins
- Find “WP Outreach” and click Activate
Method 3: WP-CLI Installation
If you have WP-CLI access, you can install directly from the command line:
# Navigate to your WordPress directory
cd /path/to/wordpress

# Install the plugin
wp plugin install /path/to/wp-outreach.zip --activate
Post-Installation Setup
After activation, WP Outreach automatically:
- Creates the necessary database tables (14 tables)
- Sets up default configuration options
- Registers required cron jobs for background processing
- Adds the WP Outreach menu to your admin sidebar
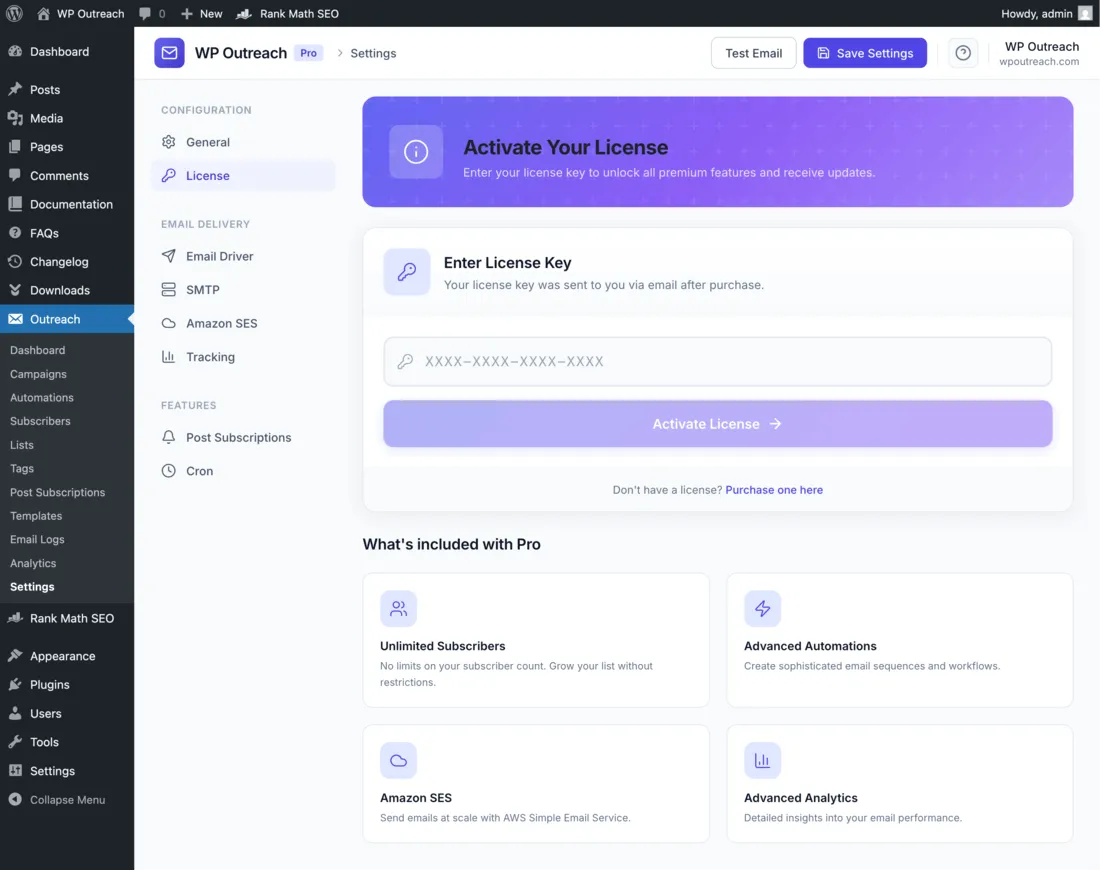
License Activation
To unlock all features and receive automatic updates, you need to activate your license:
- Go to WP Outreach → Settings → License
- Enter your license key (found in your purchase confirmation email)
- Click Activate License
- You should see a green “Active” status badge
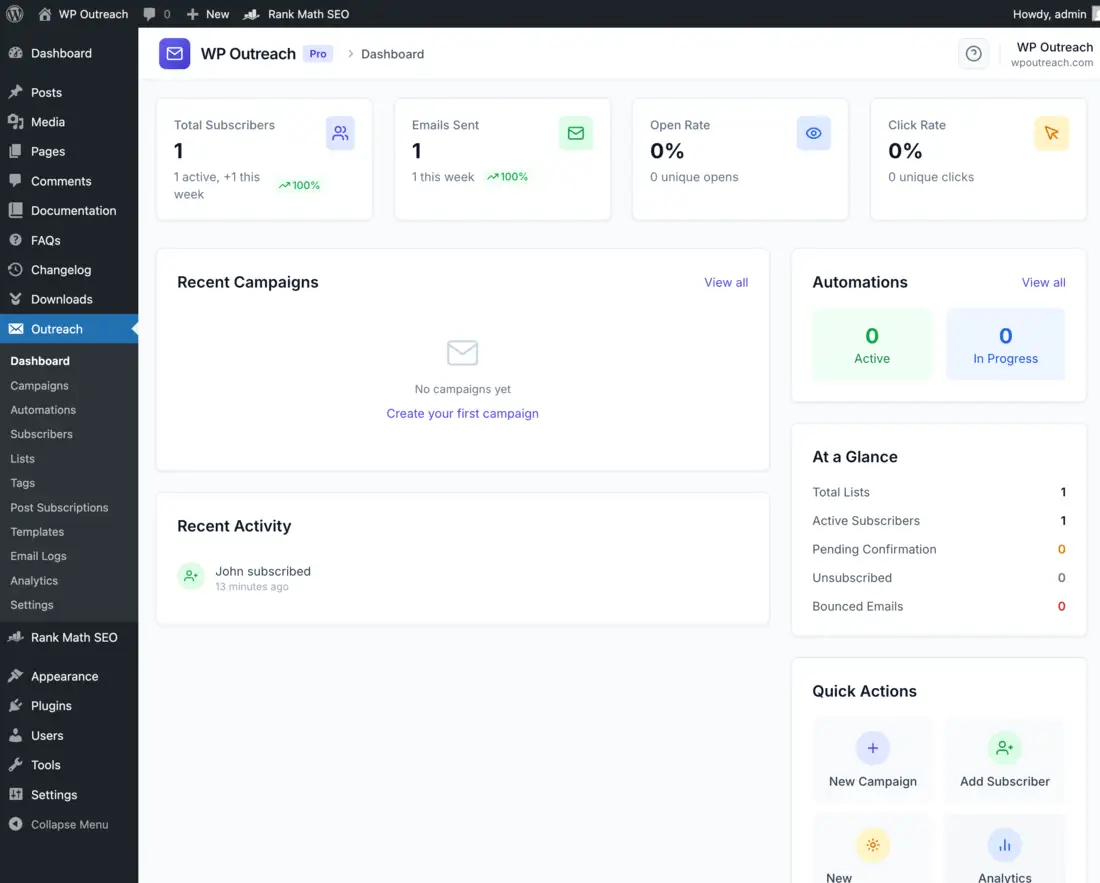
Verify Installation
To confirm everything is working correctly:
- Click on WP Outreach in the admin menu
- You should see the Dashboard with no errors
- Go to Settings → General and verify the health check shows all green
Troubleshooting
White screen or error after activation
This usually indicates a PHP version incompatibility. WP Outreach requires PHP 8.0 or higher. Contact your hosting provider to upgrade PHP.
Database tables not created
Try deactivating and reactivating the plugin. If tables still are not created, check that your database user has CREATE TABLE privileges.
Menu not appearing
Ensure you have administrator privileges. WP Outreach requires the manage_options capability to access the admin interface.
Next Steps
Now that WP Outreach is installed, continue to the Quick Start Guide to configure your email settings and send your first campaign.
Last updated: January 4, 2026